If you’re interested in siding installation, the following guide will highlight the different steps that are part of this process:
- Gather the necessary materials and tools. You will need 12-foot lengths of siding, which have to be installed over a flat surface, and these are available in different styles and colors, so you will have to select the one you want. You will also need a window or door trim channel, J-channel, utility channel, metal starter strips, corner moldings, soffits, and fascia covers.
- All siding and soffit pieces have nail slots, and you will have to nail lengths of J-channel against the inner edge, starting with the soffit. Do not nail anything tightly, and nail at the slot centers to allow for expansion.
- Once the soffit is installed, remove the gutter and slide preformed lengths of fascia cover under the gutter apron, and a nail every few feet is enough. When it comes to corners, run slightly past the original eave fascia when joining pieces and butt the intersecting gable fascia against this overrun, after which you can replace the gutter.
- When siding the walls, start by loosening or taking off any obstacles like porch lights and handrails—for example, measure from the eave to the bottom of the existing siding. Determine the best height for the metal starter strip and mark this position on the walls so that you can nail a strip of plywood above it to hold out the bottom of the first row of siding. Nail the starter strip to this plywood.
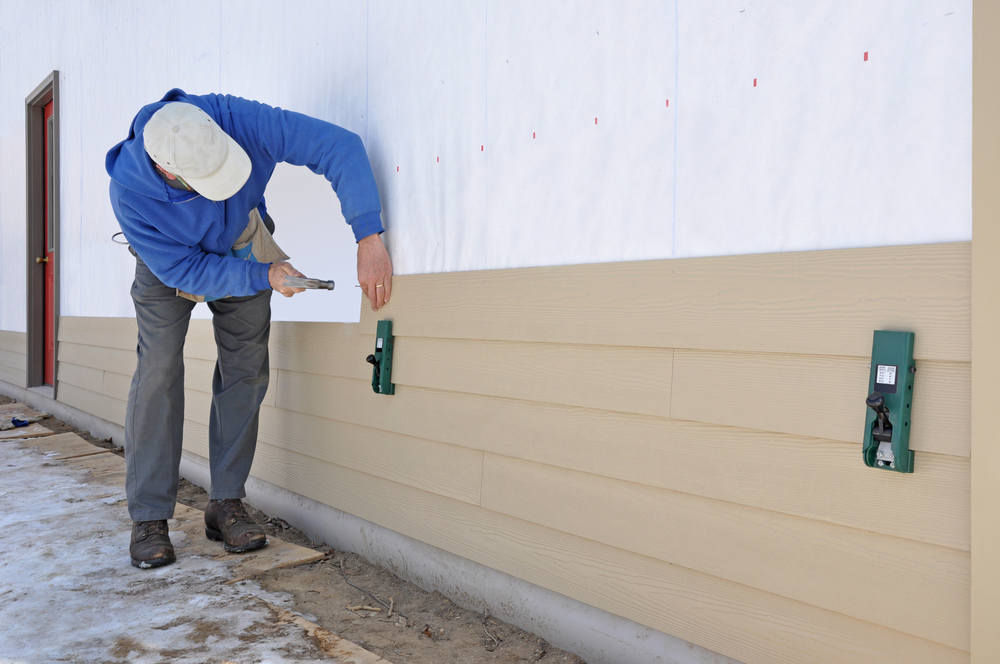
- Nail window and door trim around your exterior doors and sheath the first few feet of the walls with insulation. Next, snap each length of siding in place so that the bottom lip hooks under the starter strip, but make sure to center the nails in their slots to leave room for expansion.
- Lap one length over the other when joining two lengths of siding, and be careful when dealing with obstructions as you may have to work around them.
- Once your siding is within a foot of completion, nail lengths of utility trim to the wall just below the soffit, then nail the second-to-last row in place, and don’t forget to measure the width of the last piece. You can use a utility knife to scope the siding lengthwise and break the siding along this line. When securing the last piece, nail the top with 3D painted nails and make sure the color matches your siding and nail sparingly.
- Caulk all trim wherever it meets doors, windows, and utilities, and you will be done with the installation process.
These steps are not always easy to follow, and it’s vital that you don’t forget any details so that your siding is installed correctly. If you prefer to leave this job to a professional, Quality Edge Siding can help! We are experts in this field and will take care of all your sidings needs, so contact us today for more information!
Recent Comments